An Excellent Guide to Choosing a WordPress Theme

A-No-Nonsense-Guide-to-Choosing-a-WordPress-Theme_ywf

As a web developer, you will certainly notice that there are more than 10,000 WordPress themes currently. These amounts will confuse you, so you should know how to pick one that is best for you, right. In the following information, you can learn how to select the best theme for you. Therefore, make sure you read all of the following information.

Free Themes – Pros and Cons

Nothing wrong with free themes, they don’t necessarily have any huge disadvantages over paid themes. You don’t have to pay for any advertising on your site or branding. If you find that the free theme can fulfil your need, go for it, you can always upgrade it to premium later.

Pros:

  • Free
  • High security and good quality coding if you choose a free themen from the official WordPress directory
  • Often simple, lightweight, and easy to set up and use.

Cons:

  • Lots of people use the same themes so your site may not look unique
  • Limited customization options
  • Limited support
  • Fewer updated than premium themes

Premium Themes – Pros and Cons

Generally, big sites or company will use premium themes, if you’re setting up a site for your business, you have a blog with a large following that you want to move to WordPress, or if you want to make any kind of income from your site, you might want to think about choosing premium from the start. Moreover, having a premium theme also will give you a unique theme. However, this doesn’t mean that a premium theme is always better than a free theme. You can still find some badly coded and slow to load premium themes out there.

The price of a premium theme varies from just a few dollars to several hundred. Besides, high price doesn’t guarantee the quality. Therefore, you have to be smart in choosing the right features of your theme.

Pros:

  • More features
  • Unique design
  • More frequent updates
  • Advanced customization options
  • Developer support.

Cons:

  • Not always more secure or better coded than free themes
  • Some premium themes are bloated and slow to load
  • Not free
  • Most premium themes ask for a recurring payment to keep receiving support and updates.

After knowing the pros and cons between free and premium theme, now it’s time to choose your WordPress theme design. Here is some guidance for choosing the right theme.

  1. Fit for Purpose

When choosing for a theme, it is not for beauty only, but the main purpose of your site is also important. For example, if your content is mostly text then you’ll want to choose a theme that’s designed for a good reading experience. However, if you want to display more images with a focus on visual content don’t choose an image-heavy design, although it may look pretty.

  1. The Importance of Responsive Design

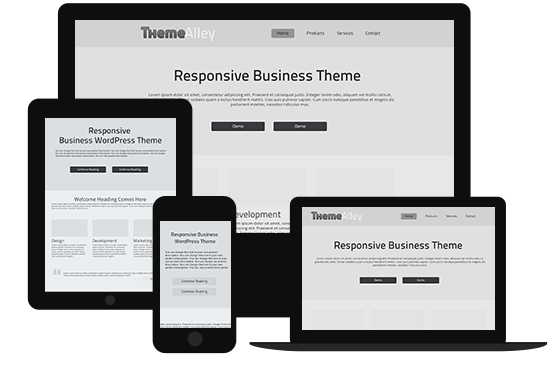
As so many people are using smart phones and other small screen devices to access the web, it is necessary to use a fully responsive theme. Make sure you’re happy with how the site looks and works on mobile as well as full screen.

  1. Keep it Clean and Simple

To set a style that will be suitable for a long time, you better choose a simple design that can showcase your content. In fact, overly designed themes go out of fashion very quickly.

Instead of focusing on the images, it is also important to look at the layout and spacing of the site. Some themes may look amazing in preview, but when you substitute in your own images, they’re not so impressive.

  1. Theme Features and Plugin Compatibility

Another aspect is to consider the additional functionality of the theme. Many premium themes come with all sorts of bells and whistles, which may or may not be useful for your personal needs. Besides, premium themes tend to have more advanced and extensive features. Some common features of premium themes include:

  • Image or featured posts slider
  • Social sharing icons, menus, and widgets
  • Custom page styles (different layouts for blog, gallery, about, etc.)
  • Mega menus
  • Retina-ready (theme looks crisper and more detailed on HD displays)
  • Custom shortcodes (to easily add buttons, styled links, icons and other design elements to your site posts and pages)
  • Ecommerce features
  • Translation ready

But, be careful when choosing a theme with too many features. You can usually use a separate plugin to do the same job, so never base your choice on features alone.

  1. SEO

We cannot neglect the SEO standards which will make your web easily to be searched for when someone searched for a related term. Therefore, make sure that your site is marked up properly with meaning using the correct code for page headings, image descriptions, etc.) And that it loads quickly. To find theme that is SEO friendly, you can do your own research and read some real reviews from people’s experience.

All the above tips lead you to one thing that you should know which theme that has a good quality and suitable for your needs.
Keyword Cannibalization: How to Find & Solve It

Keyword Cannibalization How to Find & Solve It

In SEO service, when you are splitting CTR, links, content, and (often) conversions between two pages that should be one, you are “cannibalizing” your own results. This is because you don’t describe any improvement and the breadth or depth of your knowledge. On the other hand, you are troubling Google to choose which one suits the matching keywords best.

Negative Effects of Keyword Cannibalization
If you do the keyword cannibalization, there are 6 negative effects of keyword cannibalization that can affect your SEO, such as:

1. You’re Diminishing the Authority of Your Page

By doing keyword cannibalization, you are splitting your CTR to multiple moderately relevant pages, instead of having one highly authoritative page. This not only would turn your pages into competitors, but also fight for page views and SERP ranks.

2. You’re Diluting Your Links & Anchor text

Backlinks that could have gone to one consolidated source of information are now being split into two pages. Instead of one authoritative page on the subject, your anchor text and internal links are leading visitors to multiple different pages.

3. Google May Devalue the More Relevant Page

To help Google understands what your pages are about; usually we will use keywords to signify the pages. When you put the same keywords on several pages, Google will search which one will suit best. However, it might get it wrong, if your content is too similar.

4. You’re Squandering Your Crawl Budget

Search engine spider crawls will examine your website in a number of times. This activity is known as crawl budget. In fact, all of your efforts will go in vain when you are having multiple pages devoted to the same keyword results in the crawling and indexing of page that aren’t needed.

5. Sign of Poor Page Quality

Keyword cannibalization can also be  caused by too thin content which may not match your keywords on each page.

6. Your conversion Rate will Suffer

Since Google will choose one that fits best  with your keywords, one of your pages will convert better than the rest. Not all of your visitors will visit the page that has been signified by Google; instead, some of them will lose potential leads when they land on less relevant pages.

How to Identify Keyword Cannibalization
To avoid the six effects that might damage your SEO effort, first you should identify the problem. Only by identifying the problem, you can fix the keyword cannibalization easily. Identifying keyword

1. Restructure Your Website

One of the simplest solutions is to turn your most authoritative page into a landing page which links to other unique variations that fall under the umbrella of your targeted keywords. For instance, it will make sense to make “shoes” our canonical source page and link all of the more specific variations back to our shoe-product.

2. Create New Landing Pages

If your website might lack a landing page that consolidates all of your product pages in one place, you can create a unique landing page to serve as your authoritative source page and link all of your product variations from there.

3. Consolidate Your Content

You can consider combining your pages into one page, if your pages aren’t unique enough. This is where you can take two underperforming pages and turn them into a more authoritative source. Moreover, this  will also solve your thin content issues.

4. Find New keywords

If you are sure enough that your page is already highly diverse, content-rich pages, but you still suffer keyword cannibalization, maybe it is time for you to find new keywords. Therefore, make sure your keywords accurately describe your page’s content.

5. Use 301 Redirects

If in many cases, using 301s is not recommended, but in certain cases using 301s might be necessary, especially if you already have multiple pages ranking for the same terms. To consolidate your cannibalized content, you can use 301s by linking all of the less relevant pages to single, more authoritative version. Remember that this tactic is suitable for pages with similar content and those matching specific keyword queries.


The solutions above can mostly fix cases of keyword cannibalization. If you experience the keyword cannibalization, don’t get panic as the damage isn’t permanent and solutions aren’t hard to come by. Make sure you follow all the tips above to solve all of the problems caused by keyword cannibalization.

How to Automate WordPress Plugin Testing Using Codeception

Many web developers get excited and thrilled at the same time when it comes to releasing a new update to one of our plugins. They are excited since there are more features and improvements to be delivered to customers, yet, this also means starting of another round of manual and rigorous release testing. Therefore, you should know the best way to improve this testing process and one option is automation. In this article, you can reveal how to implement it, so make sure that you read all of the sections in this article.

Release Testing Relay
Since there is a 3-person testing relay, usually we approach release testing. You have to ensure that your current set up involves a Google spreadsheet for each product with worksheets for each of the plugins and addons. Each sheet has lots of test scripts to perform, covering the functionality and edge cases for the plugins.

The first person will run the scripts and look for any issues. If an issue is found, then the test is considered as a fail and raised on GitHub to be fixed. Once the first person has finished and the issues have been fixed, the next person in the relay can start their round of testing. This process will be continued and repeated until there are no bugs found. Hence, this test will surely take lots of time and cost.

The testing process above includes unit tests that use PHPUnit and run by Travis Cl every time code is pushed to our GitHub repositories. Even though it is highly automated and able to catch issues with code before the release testing stage, we still need real people to test it, as unit testing is only a small part of the big testing puzzle.

Codeception
Codeception is better known as a behavior-driven testing framework that automates acceptance, functional, and unit testing. Similar to Behat, codeception is also written in PHP, the test is clear and very descriptive.

Although there are only some elements that can be clicked and it doesn’t handle JavaScript interactions, by using the WebDriver module, your acceptance tests can be run.

Installation
At the first time, you may find that setting this up can take much time, but after it ends, you will discover that writing tests is so much faster.  Like PHPUnit, we have Codeception installed in our repository using composer:

Aside from that, we also install WPBrowser, a set of WordPress extensions for Codeception. This extension provides helpful methods allowing the test ‘actor’ to interact easily with a WordPress site.

Environment
It is better for you to roll your own bash script to set up everything needed to run your acceptance tests, instead of using the WPBrowser’s WPLoader module to set up the test WordPress site. The script applies WP-CLI and includes:

  1. Installing WordPress in a tmp directory inside your repo (.gitignored of course)
  2. Build your plugins from source and install them on the site
  3. Download either PhantomJS or Selenium and fire it up to be used by the WebDriver module.
  4. Run Codeception tests
  5. Shut down PhantomJS or Selenium
  6. Kill any Firefox instances

Installation
You can find more requirements for the projects with detailed installation steps in the README.md. After everything is installed, you can fire up the test by running sh run-tests.sh.

The Scenario
The main test file, known as a ‘cept’ is a file that contains all the steps and assertions for a given scenario. The scenario is to test the core functionality of WP offload S3 Lite – upload a file to the WordPress Media Library and make sure that it gets offloaded to S3:

The steps are very understandable and show clearly the process that show what an actual tester would do, such as login, add a file to the media library, ensure that the URL is rewritten to an S3 URL, then check with AWS to find out if the file has been uploaded.

In conclusion
As it is stated above, you will need a hard work to get this all set up. Remember that the scenario above only for a single site install of WordPress. Therefore, a custom database module for Codeception is needed to make switching between databases and installs during testing as convenient as possible.

You also require script maintenance as code and product usability changes over time. Hence, the best solution is to replace two out of the three of your human testers with automated tests using Codeception. This will surely give more advantages to your release testing process.